Intro
If you installed Raspbian from the NOOBS distribution as I do, then you may occasionally “blow up” your installation as I just have! You have an out, sort of, short of re-imaging the disk, though about with the same impact.
To interrupt the boot process and enter recovery mode, attach a USB keyboard and repeatedly hit the Shift key. You should come to the NOOBS OS install selection screen. Just re-install Rasbian again… But if you’re using WiFi first configure your WiFi setup before re-installing Raspbian.
Symptoms
When I powered up, I got the initial multi-color screen. Then a two-line text message popped up – too quickly to be read, then a grayish screen, then it split into a lower and upper part, then both halves faded away and there it stayed… At that point it was not responsive to any keyboard inputs or mouse clicks.
Conclusion
While doing my advanced slide show and rotating display project, I somehow managed to blow up my OS. finding the way to interrupt the boot-up was not so easy so I am amplifying the answer that worked for me on the Internet: repeatedly hit the Shift key during the boot, until you see the NOOBS image selector screen.
Intro
Configuring your own micro SD card in order to install Raspbian on a Raspberry Pi is not so hard. Some of the instructions out there are a bit dated and make it out to be harder than it really is.
The details
For instance this site has some extra steps you don’t need: http://elinux.org/RPi_Easy_SD_Card_Setup.
I’d stick with the simplest possible approach, which turns out to be this set of instructions: https://diyhacking.com/install-raspbian-raspberry-pis-sd-card/
But all these instructions seem to refer to an IMG file which I don’t even see. The main thing is to download NOOBS (new out-of-box software) from https://www.raspberrypi.org/downloads/ .
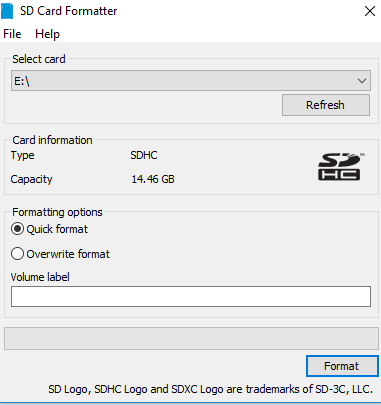
Then, get the SD card formatter. But the latest version is 5, not 4, and it looks different from before – there are essentially no options!
SD Card Formatter
So go with Quick Format and it works out OK. Unless your SD card is used. Then choose Overwrite format. That also works but takes a lot longer.
Then when it comes to copying the image file, which makes no sense with NOOBS because the image file is hidden, I think. Just extract all the files form the NOOBs zip file and copy them over to your E: drive, of whatever drive your SD card appears as.
Then follow the instructions on your Ras Pi display.
That’s it! I know because I just did it.
(non-)Reliability of SD Card
For the record, I’m in this situation because my old micro SD card just died. This is after running it continuously for a little over two years. Not very impressive in my book. Also for the record the card came as part of a Cana kit.
Symptoms of SD card failure in my case:
– boot paused, then after 120 seconds spits out some warnings about MMC something or other.
– LED status light solid green
A word about NOOBS and Balena Etcher
Note that the Etcher people were a bit lazy, and refuse to support burning NOOBS to an SD card with Etcher! to repeat, Etcher and NOOBS are incompatible. The stated reason is that NOOBS is not a true image.
A word about downloading from https://www.raspberrypi.org/downloads/
Today my PC just was not up to the task of downloading the full NOOBS zip file. It got to about 800 MB and then kept saying Failed. I found I could restart it, and that would download another 10 MB or so before failing again. This was getting pretty boring so I simply went to a Raspberry Pi and downloaded it from the command line using wget. No problems…
I suspect that my PC’s AV software was running amok and interfering with this download. I haven’t messed with disabling it in awhile (the usual prescription), so i used the Ras Pi itself. Then I did an sftp from my PC to the Ras Pi to get the downloaded image. That was also unusually slow, but it did go through, eventually.