Categories
Network Technologies Security

Internet Explorer can’t access https page – maybe a client CERT is needed?

Intro
I don’t see such issues often, but today two came to my attention. Both are quasi-government sites. Here’s an example of what you see when testing with your browser if it’s Internet Explorer:
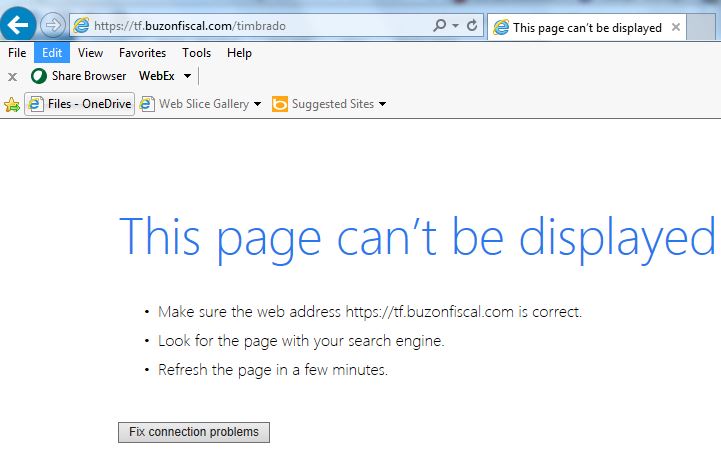
Vague error displayed by Internet Explorer when site requires a client certificate

The details
Just for the fun of it, I accessed the home page https://tf.buzonfiscal.com/ and got a 200 OK page.

I learned some more about curl and found that it can tell you what is going on.

$ curl ‐vv ‐i ‐k https://tf.buzonfiscal.com/

* About to connect() to tf.buzonfiscal.com port 443 (#0)
*   Trying 23.253.28.70... connected
* Connected to tf.buzonfiscal.com (23.253.28.70) port 443 (#0)
* successfully set certificate verify locations:
*   CAfile: none
  CApath: /etc/ssl/certs/
* SSLv3, TLS handshake, Client hello (1):
* SSLv3, TLS handshake, Server hello (2):
* SSLv3, TLS handshake, CERT (11):
* SSLv3, TLS handshake, Server key exchange (12):
* SSLv3, TLS handshake, Server finished (14):
* SSLv3, TLS handshake, Client key exchange (16):
* SSLv3, TLS change cipher, Client hello (1):
* SSLv3, TLS handshake, Finished (20):
* SSLv3, TLS change cipher, Client hello (1):
* SSLv3, TLS handshake, Finished (20):
* SSL connection using DHE-RSA-AES256-SHA
* Server certificate:
*        subject: C=MX; ST=Nuevo Leon; L=Monterrey; O=Diverza informacion y Analisis  SAPI de CV; CN=*.buzonfiscal.com
*        start date: 2016-07-07 00:00:00 GMT
*        expire date: 2018-07-07 23:59:59 GMT
*        subjectAltName: tf.buzonfiscal.com matched
*        issuer: C=US; O=thawte, Inc.; CN=thawte SSL CA - G2
*        SSL certificate verify ok.
> GET / HTTP/1.1
> User-Agent: curl/7.19.7 (x86_64-suse-linux-gnu) libcurl/7.19.7 OpenSSL/0.9.8j zlib/1.2.3 libidn/1.10
> Host: tf.buzonfiscal.com
> Accept: */*
>
< HTTP/1.1 200 OK
HTTP/1.1 200 OK
< Date: Fri, 22 Jul 2016 15:50:44 GMT
Date: Fri, 22 Jul 2016 15:50:44 GMT
< Server: Apache/2.2.4 (Win32) mod_ssl/2.2.4 OpenSSL/0.9.8e mod_jk/1.2.37
Server: Apache/2.2.4 (Win32) mod_ssl/2.2.4 OpenSSL/0.9.8e mod_jk/1.2.37
< Accept-Ranges: bytes
Accept-Ranges: bytes
< Content-Length: 23
Content-Length: 23
< Content-Type: text/html
Content-Type: text/html
 
<
<html>
200 OK
* Connection #0 to host tf.buzonfiscal.com left intact
* Closing connection #0
* SSLv3, TLS alert, Client hello (1):

Now look at the difference when we access the page with the problem.

$ curl ‐vv ‐i ‐k https://tf.buzonfiscal.com/timbrado

* About to connect() to tf.buzonfiscal.com port 443 (#0)
*   Trying 23.253.28.70... connected
* Connected to tf.buzonfiscal.com (23.253.28.70) port 443 (#0)
* successfully set certificate verify locations:
*   CAfile: none
  CApath: /etc/ssl/certs/
* SSLv3, TLS handshake, Client hello (1):
* SSLv3, TLS handshake, Server hello (2):
* SSLv3, TLS handshake, CERT (11):
* SSLv3, TLS handshake, Server key exchange (12):
* SSLv3, TLS handshake, Server finished (14):
* SSLv3, TLS handshake, Client key exchange (16):
* SSLv3, TLS change cipher, Client hello (1):
* SSLv3, TLS handshake, Finished (20):
* SSLv3, TLS change cipher, Client hello (1):
* SSLv3, TLS handshake, Finished (20):
* SSL connection using DHE-RSA-AES256-SHA
* Server certificate:
*        subject: C=MX; ST=Nuevo Leon; L=Monterrey; O=Diverza informacion y Analisis  SAPI de CV; CN=*.buzonfiscal.com
*        start date: 2016-07-07 00:00:00 GMT
*        expire date: 2018-07-07 23:59:59 GMT
*        subjectAltName: tf.buzonfiscal.com matched
*        issuer: C=US; O=thawte, Inc.; CN=thawte SSL CA - G2
*        SSL certificate verify ok.
> GET /timbrado HTTP/1.1
> User-Agent: curl/7.19.7 (x86_64-suse-linux-gnu) libcurl/7.19.7 OpenSSL/0.9.8j zlib/1.2.3 libidn/1.10
> Host: tf.buzonfiscal.com
> Accept: */*
>
* SSLv3, TLS handshake, Hello request (0):
* SSLv3, TLS handshake, Client hello (1):
* SSLv3, TLS handshake, Server hello (2):
* SSLv3, TLS handshake, CERT (11):
* SSLv3, TLS handshake, Server key exchange (12):
* SSLv3, TLS handshake, Request CERT (13):
* SSLv3, TLS handshake, Server finished (14):
* SSLv3, TLS handshake, CERT (11):
* SSLv3, TLS handshake, Client key exchange (16):
* SSLv3, TLS change cipher, Client hello (1):
* SSLv3, TLS handshake, Finished (20):
* SSLv3, TLS alert, Server hello (2):
* SSL read: error:14094410:SSL routines:SSL3_READ_BYTES:sslv3 alert handshake failure, errno 0
* Empty reply from server
* Connection #0 to host tf.buzonfiscal.com left intact
curl: (52) SSL read: error:14094410:SSL routines:SSL3_READ_BYTES:sslv3 alert handshake failure, errno 0
* Closing connection #0

There is this line that we didn’t have before, which comes immediately after the server has received the GET request:

SSLv3, TLS handshake, Hello request (0):

I think that is the server requesting a certificate from the client (sometimes known as a digital ID). You don’t see that often but in government web sites I guess it happens, especially in Latin America.

Lessons learned
I eventually have learned after all these years that the ‐vv switch in curl gives helpful information for debugging purposes like we need here.

I had naively assumed that if a site requires a client certificate it would require it for all pages. These two examples belie that assumption. Depedning on the URI, the behaviour of curl is completely different. In other words one page requires a client certificate and the other doesn’t.

Where to get this client certificate
In my experience the web site owner normally issues you your client certificate. You can try to use a random one, self-signed etc, but that’s extremely unlikely to work since they’ve already bothered with this high level of security why wold they throw that effort away and permit a certificate that they can not verify?
Categories
Admin Network Technologies Security

IP address wall of shame

Intro
It can be very time-consuming to report bad actors on the Internet. The results are unpredictable and I suppose in some cases the situation could be worsened. Out of general frustration, I’ve decided to publicly list the worst offenders.

The details
These are individual IPs or networks that have initiated egregious hacking attempts against my server over the past few years.

I can list them as follows:

$ netstat ‐rn|cut ‐c‐16|egrep ‐v ^'10\.|172|169'

Kernel IP routing table
Destination     Gateway         Genmask
46.151.52.61    127.0.0.1       255.255.255.255
23.110.213.91   127.0.0.1       255.255.255.255
183.3.202.105   127.0.0.1       255.255.255.255
94.249.241.48   127.0.0.1       255.255.255.255
82.19.207.212   127.0.0.1       255.255.255.255
46.151.52.37    127.0.0.1       255.255.255.255
43.229.53.13    127.0.0.1       255.255.255.255
93.184.187.75   127.0.0.1       255.255.255.255
43.229.53.14    127.0.0.1       255.255.255.255
144.76.170.101  127.0.0.1       255.255.255.255
198.57.162.53   127.0.0.1       255.255.255.255
146.185.251.252 127.0.0.1       255.255.255.255
123.242.229.75  127.0.0.1       255.255.255.255
113.160.158.43  127.0.0.1       255.255.255.255
46.151.52.0     127.0.0.1       255.255.255.0
121.18.238.0    127.0.0.1       255.255.255.0
58.218.204.0    127.0.0.1       255.255.255.0
221.194.44.0    127.0.0.1       255.255.255.0
43.229.0.0      127.0.0.1       255.255.0.0
0.0.0.0         10.185.21.65    0.0.0.0

Added after the initial post
185.110.132.201/32
69.197.191.202/32 – 8/2016
119.249.54.0/24 – 10/2016
221.194.47.0/24 – 10/2016
79.141.162.0/23 – 10/2016
91.200.12.42 – 11/2016. WP login attempts
83.166.243.120 – 11/2016. WP login attempts
195.154.252.100 – 12/2016. WP login attemtps
195.154.252.0/23 – 12/2016. WP login attempts
91.200.12.155/24 – 12/2016. WP login attempts
185.110.132.202 – 12/2016. ssh attempts
163.172.0.0/16 – 12/2016. ssh attempts
197.88.63.63 – WP login attempts
192.151.151.34 – 4/2017. WP login attempts
193.201.224.223 – 4/2017. WP login attempts
192.187.98.42 – 4/2017. WP login attempts
192.151.159.2 – 5/2017. WP login attempts
192.187.98.43 – 6/2017. WP login attempts

The offense these IPs are guilty of is trying obsessively to log in to my server. Here is how I show login attempts:

$ cd /var/log; sudo last ‐f btmp|more

qwsazx   ssh:notty    175.143.54.193   Tue Jul 12 15:23    gone - no logout
qwsazx   ssh:notty    175.143.54.193   Tue Jul 12 15:23 - 15:23  (00:00)
pi       ssh:notty    185.110.132.201  Tue Jul 12 14:57 - 15:23  (00:26)
pi       ssh:notty    185.110.132.201  Tue Jul 12 14:57 - 14:57  (00:00)
ubnt     ssh:notty    185.110.132.201  Tue Jul 12 14:18 - 14:57  (00:39)
ubnt     ssh:notty    185.110.132.201  Tue Jul 12 14:18 - 14:18  (00:00)
brandon  ssh:notty    175.143.54.193   Tue Jul 12 13:46 - 14:18  (00:31)
brandon  ssh:notty    175.143.54.193   Tue Jul 12 13:46 - 13:46  (00:00)
ubnt     ssh:notty    185.110.132.201  Tue Jul 12 13:41 - 13:46  (00:04)
ubnt     ssh:notty    185.110.132.201  Tue Jul 12 13:41 - 13:41  (00:00)
root     ssh:notty    185.110.132.201  Tue Jul 12 13:08 - 13:41  (00:33)
PlcmSpIp ssh:notty    118.68.248.183   Tue Jul 12 13:03 - 13:08  (00:05)
PlcmSpIp ssh:notty    118.68.248.183   Tue Jul 12 13:02 - 13:03  (00:00)
support  ssh:notty    118.68.248.183   Tue Jul 12 13:02 - 13:02  (00:00)
glassfis ssh:notty    175.143.54.193   Tue Jul 12 12:59 - 13:02  (00:03)
glassfis ssh:notty    175.143.54.193   Tue Jul 12 12:59 - 12:59  (00:00)
support  ssh:notty    185.110.132.201  Tue Jul 12 12:34 - 12:59  (00:24)
support  ssh:notty    185.110.132.201  Tue Jul 12 12:34 - 12:34  (00:00)
amber    ssh:notty    175.143.54.193   Tue Jul 12 12:10 - 12:34  (00:24)
amber    ssh:notty    175.143.54.193   Tue Jul 12 12:10 - 12:10  (00:00)
admin    ssh:notty    185.110.132.201  Tue Jul 12 12:00 - 12:10  (00:09)
admin    ssh:notty    185.110.132.201  Tue Jul 12 12:00 - 12:00  (00:00)
steam1   ssh:notty    175.143.54.193   Tue Jul 12 11:29 - 12:00  (00:31)
steam1   ssh:notty    175.143.54.193   Tue Jul 12 11:29 - 11:29  (00:00)
robyn    ssh:notty    175.143.54.193   Tue Jul 12 08:37 - 11:29  (02:52)
robyn    ssh:notty    175.143.54.193   Tue Jul 12 08:37 - 08:37  (00:00)
postgres ssh:notty    209.92.176.23    Tue Jul 12 08:16 - 08:37  (00:20)
postgres ssh:notty    209.92.176.23    Tue Jul 12 08:16 - 08:16  (00:00)
root     ssh:notty    209.92.176.23    Tue Jul 12 08:16 - 08:16  (00:00)
a        ssh:notty    209.92.176.23    Tue Jul 12 08:16 - 08:16  (00:00)
plex     ssh:notty    175.143.54.193   Tue Jul 12 07:51 - 08:16  (00:24)
plex     ssh:notty    175.143.54.193   Tue Jul 12 07:51 - 07:51  (00:00)
root     ssh:notty    40.76.25.178     Tue Jul 12 06:06 - 07:51  (01:45)
pi       ssh:notty    64.95.100.89     Tue Jul 12 05:49 - 06:06  (00:16)
pi       ssh:notty    64.95.100.89     Tue Jul 12 05:49 - 05:49  (00:00)
...

The above is a sampling from today’s culprits. It’s a small, slow server so logins take a bit of time and brute force dictionary attacks are not going to succeed. But honestly, These IPs ought to be banned from the Internet for such flagrant abuse. I only add the ones to my route table which are multiply repeating offenders.

Here is the syntax on my server I use to add a network to this wall of shame:

$ sudo route add ‐net 221.194.44.0/24 gateway 127.0.0.1

So, yeah, I just send them to the loopback interface which prevents my servers from sending any packets to them. I could have used the Amazon AWS firewall but I find this more convenient – the command is always in my bash shell history.

A word about other approaches like fail2ban
Subject matter experts will point out the existence of tools, notably, fail2ban, which will handle excessive login attempts from a single IP. I already run fail2ban, which you can read about in this posting. The IPs above are generally those that somehow persisted and needed extraordinary measures in my opinion.

August 2017 update
I finally had to reboot my AWS instance after more than three years. I thought about my ssh usage pattern and decided it was really predictable: I either ssh from home or work, both of which have known IPs. And I’m simply tired of seeing all the hack attacks against my server. And I got better with the AWS console out of necessity.
Put it all together and you get a better way to deal with the ssh logins: simply block ssh (tcp port 22) with an AWS security group rule, except from my home and work.

References and related
My original defense began with an implementation of fail2ban. This is the write-up.

Categories
Admin Network Technologies

The IT Detective Agency: the case of the mysterious reset

Intro
An F5 BigIP load balancer equipped with web application firewall worked for everyone, except one app used by one customer. What was going wrong?


Packet trace

I always do a packet trace when there is nothing else to go on, as is so often the case these days. Packet traces themselves are getting increasingly complex, what with encrypted communications and multiple connections, etc. In this case there seemed to be a single TCP connection which was of concern, but it was encrypted (SSL traffic on tcp port 443).

Well, I have access to the private key so I figured out how to insert that into Wireshark so it could decrypt the packets. Pretty cool – I’ve never done that before.

So the communication got a lot further than I had expected. What I had expected to learn is that there was an incompatibility between supported ciphers of the client and the server such that there were no overlapping ciphers. But no! That was not the case at all – the packet trace got well beyond that early stage of packet exchanges between client and server.

In fact the client got so far that it sent these (encrypted) HTTP headers, which I was able to decrypt with Wireshark and the servers’ private key:

POST /cgi-bin/java/JHAutomation.do?perform=login HTTP/1.0
Content-type: application/x-www-form-urlencoded
Content-length: 1816
host: drjohnstechtalk.com:443
 
loginRequest=%3C%3Fxml+version+%3D+'1.0'+encoding...

Then right after that I saw the F5 BigIP device send the client a TCP reset (RST) as though it was unhappy about something and wanted to end it right there!

So, still stuck, I searched and found that you can enable logging of the reason for the TCP RST’s on F5 BigIPs:

Enable RST logging
To enable reset logging to the ltm log:
# tmsh
(tmos)# modify /sys db tm.rstcause.log value enable

And this is the error that was logged:

Logged error

Jun 16 08:09:19 local/tmm err tmm[5072]: 01230140:3: RST sent from 8.29.2.75:443 to 50.17.188.196:56985, [0x11d17ec:1804] No available pool member

It’s just a hint of what was wrong, but it was enough to jog my memory. A WAF (web application firewall) policy exists that matches based on hostname and otherwise exits. The hostname entered is drjohnstechtalk.com. Well, clearly that match is pretty darn literal. When we put the same URL into our browser or into curl we could not reproduce the error. But those clients produce a host header with value drjohnstechtalk.com, not drjohnstechtalk.com:443.

So their client, a strange Java-base client, threw in the :443 into the host header and it was not matching the host header match in the WAF policy! So no pool was selected and the fall-through rule was executed, resulting in a TCP RST to the client!

I added an additional host header to match, drjohnstechtalk.com:443

They tested and it worked!

Case closed.

Conclusion
A mysterious TCP RST sent from an F5 load balancer to just one client is explained in great detail. Some valuable networking tools were learned in the process, namely, how to decrypt an encrypted SSL packet trace.

Analysis
Could I stand on my high horse and complain that they were sending a non-standard header and go fix their stupid client? Well that might have felt satisfying but when I looked at the HTTP standard it does permit the port number to be present in that form! So I was the one in the wrong, even from a protocol standpoint.

References and related
F5’s SOL 13223 describing enabling logging for TCP RST packets https://support.f5.com/kb/en-us/solutions/public/13000/200/sol13223.html
HTTP Request header fields are described in this Wikipedia article.

Categories
Admin Apache CentOS Network Technologies Security Web Site Technologies

Idea for free web server certificates: Let’s Encrypt

Intro
I’ve written various articles about SSL. I just came across a way to get your certificates for free, letsencrypt.org. But their thing is to automate certificate management. I think you have to set up the whole automated certificate management environment just to get one of their free certificates. So that’s a little unfortunate, but I may try it and write up my experience with it in this blog (Update: I did it!). Stay tuned.

Short duration certificates
I recently happened upon a site that uses one of these certificates and was surprised to see that it expires in 90 days. All the certificate I’ve ever bought are valid for at least a year, sometimes two or three. But Let’s Encrypt has a whole page justifying their short certificates which kind of makes sense. It forces you to adopt their automation processes for renewal because it will be too burdensome for site admins to constantly renew these certificates by hand the way they used to.

November 2016 update
Since posting this article I have worked with a hosting firm a little bit. I was surprised by how easily he could get for one of “my” domain names. Apparently all it took was that Let’s Encrypt could verify that he owned the IP address which my domain name resolved to. That’s different from the usual way of verification where the whois registration of the domain gets queried. That never happened here! I think by now the Let’s Encrypt CA, IdenTrust Commercial Root CA 1, is accepted by the major browsers.

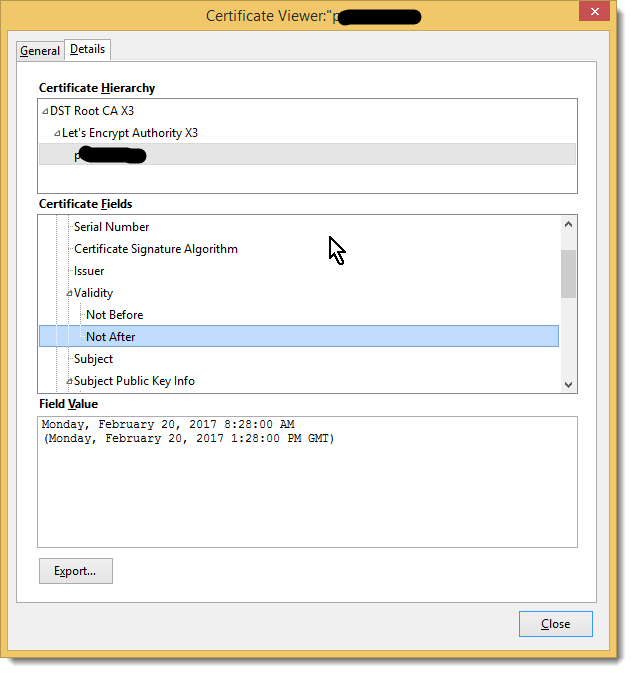
Here’s a picture that shows one of these certificates which was just issued November, 2016 with its short expiration.

lets-encrypt-2016-11-22_15-03-39

My own experience in getting a certificate
I studied the ACME protocol a little bit. It’s complicated. Nothing’s easy these days! So you need a program to help you implement it. I went with acme.sh over Certbot because it is much more lightweight – works through bash shell. Certbot wanted to update about 40 packages on my system, which really seems like overkill.

I’m very excited about how easy it was to get my first certificate from letsencrypt! Worked first time. I made sure the account I ran this command from had write access to the HTMLroot (the “webroot”) because an authentication challenge occurs to prove that I administer that web server:

$ acme.sh ‐‐issue ‐d drjohnstechtalk.com ‐w /web/drj

[Wed Nov 30 08:55:54 EST 2016] Registering account
[Wed Nov 30 08:55:56 EST 2016] Registered
[Wed Nov 30 08:55:57 EST 2016] Update success.
[Wed Nov 30 08:55:57 EST 2016] Creating domain key
[Wed Nov 30 08:55:57 EST 2016] Single domain='drjohnstechtalk.com'
[Wed Nov 30 08:55:57 EST 2016] Getting domain auth token for each domain
[Wed Nov 30 08:55:57 EST 2016] Getting webroot for domain='drjohnstechtalk.com'
[Wed Nov 30 08:55:57 EST 2016] _w='/web/drj'
[Wed Nov 30 08:55:57 EST 2016] Getting new-authz for domain='drjohnstechtalk.com'
[Wed Nov 30 08:55:58 EST 2016] The new-authz request is ok.
[Wed Nov 30 08:55:58 EST 2016] Verifying:drjohnstechtalk.com
[Wed Nov 30 08:56:02 EST 2016] Success
[Wed Nov 30 08:56:02 EST 2016] Verify finished, start to sign.
[Wed Nov 30 08:56:03 EST 2016] Cert success.
-----BEGIN CERTIFICATE-----
MIIFCjCCA/KgAwIBAgISA8T7pQeg535pA45tryZv6M4cMA0GCSqGSIb3DQEBCwUA
MEoxCzAJBgNVBAYTAlVTMRYwFAYDVQQKEw1MZXQncyBFbmNyeXB0MSMwIQYDVQQD
ExpMZXQncyBFbmNyeXB0IEF1dGhvcml0eSBYMzAeFw0xNjExMzAxMjU2MDBaFw0x
NzAyMjgxMjU2MDBaMB4xHDAaBgNVBAMTE2Ryam9obnN0ZWNodGFsay5jb20wggEi
MA0GCSqGSIb3DQEBAQUAA4IBDwAwggEKAoIBAQC1PScaoxACI0jhsgkNcbd51YzK
eVI/P/GuFO8VCTYvZAzxjGiDPfkEmYSYw5Ii/c9OHbeJs2Gj5b0tSph8YtQhnpgZ
c+3FGEOxw8mP52452oJEqrUldHI47olVPv+gnlqjQAMPbtMCCcAKf70KFc1MiMzr
2kpGmJzKFzOXmkgq8bv6ej0YSrLijNFLC7DoCpjV5IjjhE+DJm3q0fNM3BBvP94K
jyt4JSS1d5l9hBBIHk+Jjg8+ka1G7wSnqJVLgbRhEki1oh8HqH7JO87QhJA+4MZL
wqYvJdoundl8HahcknJ3ymAlFXQOriF23WaqjAQ0OHOCjodV+CTJGxpl/ninAgMB
AAGjggIUMIICEDAOBgNVHQ8BAf8EBAMCBaAwHQYDVR0lBBYwFAYIKwYBBQUHAwEG
CCsGAQUFBwMCMAwGA1UdEwEB/wQCMAAwHQYDVR0OBBYEFGaLNxVgpSFqgf5eFZCH
1B7qezB6MB8GA1UdIwQYMBaAFKhKamMEfd265tE5t6ZFZe/zqOyhMHAGCCsGAQUF
BwEBBGQwYjAvBggrBgEFBQcwAYYjaHR0cDovL29jc3AuaW50LXgzLmxldHNlbmNy
eXB0Lm9yZy8wLwYIKwYBBQUHMAKGI2h0dHA6Ly9jZXJ0LmludC14My5sZXRzZW5j
cnlwdC5vcmcvMB4GA1UdEQQXMBWCE2Ryam9obnN0ZWNodGFsay5jb20wgf4GA1Ud
IASB9jCB8zAIBgZngQwBAgEwgeYGCysGAQQBgt8TAQEBMIHWMCYGCCsGAQUFBwIB
FhpodHRwOi8vY3BzLmxldHNlbmNyeXB0Lm9yZzCBqwYIKwYBBQUHAgIwgZ4MgZtU
aGlzIENlcnRpZmljYXRlIG1heSBvbmx5IGJlIHJlbGllZCB1cG9uIGJ5IFJlbHlp
bmcgUGFydGllcyBhbmQgb25seSBpbiBhY2NvcmRhbmNlIHdpdGggdGhlIENlcnRp
ZmljYXRlIFBvbGljeSBmb3VuZCBhdCBodHRwczovL2xldHNlbmNyeXB0Lm9yZy9y
ZXBvc2l0b3J5LzANBgkqhkiG9w0BAQsFAAOCAQEAc4w4a+PFpZqpf+6IyrW31lj3
iiFIpWYrmg9sa79hu4rsTxsdUs4K9mOKuwjZ4XRfaxrRKYkb2Fb4O7QY0JN482+w
PslkPbTorotcfAhLxxJE5vTNQ5XZA4LydH1+kkNHDzbrAGFJYmXEu0EeAMlTRMUA
N1+whUECsWBdAfBoSROgSJIxZKr+agcImX9cm4ScYuWB8qGLK98RTpFmGJc5S52U
tQrSJrAFCoylqrOB67PXmxNxhPwGmvPQnsjuVQMvBqUeJMsZZbn7ZMKr7NFMwGD4
BTvUw6gjvN4lWvs82M0tRHbC5z3mALUk7UXrQqULG3uZTlnD7kA8C39ulwOSCQ==
-----END CERTIFICATE-----
[Wed Nov 30 08:56:03 EST 2016] Your cert is in  /home/drj/.acme.sh/drjohnstechtalk.com/drjohnstechtalk.com.cer
[Wed Nov 30 08:56:03 EST 2016] Your cert key is in  /home/drj/.acme.sh/drjohnstechtalk.com/drjohnstechtalk.com.key
[Wed Nov 30 08:56:04 EST 2016] The intermediate CA cert is in  /home/drj/.acme.sh/drjohnstechtalk.com/ca.cer
[Wed Nov 30 08:56:04 EST 2016] And the full chain certs is there:  /home/drj/.acme.sh/drjohnstechtalk.com/fullchain.cer

Behind the scenes the authentication resulted in these two accesses to my web server:

66.133.109.36 - - [30/Nov/2016:08:55:59 -0500] "GET /.well-known/acme-challenge/EJlPv9ar7lxvlegqsdlJvsmXMTyagbBsWrh1p-JoHS8 HTTP/1.1" 301 618 "-" "Mozilla/5.0 (compatible; Let's Encrypt validation server; +https://www.letsencrypt.org)"
66.133.109.36 - - [30/Nov/2016:08:56:00 -0500] "GET /.well-known/acme-challenge/EJlPv9ar7lxvlegqsdlJvsmXMTyagbBsWrh1p-JoHS8 HTTP/1.1" 200 5725 "http://drjohnstechtalk.com/.well-known/acme-challenge/EJlPv9ar7lxvlegqsdlJvsmXMTyagbBsWrh1p-JoHS8" "Mozilla/5.0 (compatible; Let's Encrypt validation server; +https://www.letsencrypt.org)" "drjohnstechtalk.com"

The first was HTTP which I redirect to https while preserving the URL, hence the second request. You see now why I needed write access to the webroot of my web server.

Refine our approach
In the end iI decided to run as root in order to protect the private key from prying eyes. This looked like this:

$ acme.sh ‐‐issue ‐‐force ‐d drjohnstechtalk.com ‐w /web/drj ‐‐reloadcmd "service apache24 reload" ‐‐certpath /etc/apache24/certs/drjohnstechtalk.crt ‐‐keypath /etc/apache24/certs/drjohnstechtalk.key ‐‐fullchainpath /etc/apache24/certs/fullchain.cer

What’s a nice feature about acme.sh is that it remembers parameters you’ve typed by hand and fills them into a single convenient configuration file. So the contents of mine look like this:

Le_Domain='drjohnstechtalk.com'
Le_Alt='no'
Le_Webroot='/web/drj'
Le_PreHook=''
Le_PostHook=''
Le_RenewHook=''
Le_API='https://acme-v01.api.letsencrypt.org'
Le_Keylength=''
Le_LinkCert='https://acme-v01.api.letsencrypt.org/acme/cert/037fe5215bb5f4df6a0098fefd50b83b046b'
Le_LinkIssuer='https://acme-v01.api.letsencrypt.org/acme/issuer-cert'
Le_CertCreateTime='1480710570'
Le_CertCreateTimeStr='Fri Dec  2 20:29:30 UTC 2016'
Le_NextRenewTimeStr='Tue Jan 31 20:29:30 UTC 2017'
Le_NextRenewTime='1485808170'
Le_RealCertPath='/etc/apache24/certs/drjohnstechtalk.crt'
Le_RealCACertPath=''
Le_RealKeyPath='/etc/apache24/certs/drjohnstechtalk.key'
Le_ReloadCmd='service apache24 reload'
Le_RealFullChainPath='/etc/apache24/certs/fullchain.cer'

References and related
Examples of using Lets Encrypt with domain (DNS) validation: How I saved $69 a year on certificate cost.
The Let’s Encrypt web site, letsencrypt.org
When I first switched from http to https: drjohnstechtalk is now an encrypted web site
Ciphers
Let’s Encrypt’s take on those short-lived certificates they issue: Why 90-day certificates
acme.sh script which I used I obtained from this site: https://github.com/Neilpang/acme.sh
CERTbot client which implements ACME protocol: https://certbot.eff.org/
IETF ACME draft proposal: https://datatracker.ietf.org/doc/draft-ietf-acme-acme/?include_text=1

Categories
Admin Network Technologies

Strange problem with Internet fiber connection

Intro
Yesterday the company I’ve been consulting for had a partial outage with their multi-gigabit fiber connection with TWC business class in North Carolina. We’ve never seen an outage with these characteristics.

The details
The outage was mostly unnoticed but various SiteScope monitors that fetch web pages were periodically going off and then working again. So it wasn’t a hard outage. How do you pin something like that down?

It’s easiest to relate to a web site whose IP address isn’t constantly changing, which pretty much rules out the majors like google.com or microsoft.com. I actually used my own site – it’s running on good infrastructure in Amazon’s data center and its IP is fixed. And yes I was occasionally seeing timeouts. Could it be simply waiting for a DNS lookup? That would explain everything. So I ran verbosely:

$ curl ‐vv www.drjohnstechtalk.com

* About to connect() to www.drjohnstechtalk.com port 80 (#0)
*   Trying 50.17.188.196...

That response came quickly, then it froze. So I knew it wasn’t a DNS resolution problem. This could have also been shown by doing a trace, but the curl method was a faster way to get results.

I decided to put a max_time limit on curl of one second just to get a feel for the problem, running this command frequently:

$ curl ‐m1 www.drjohnstechtalk.com

After all when the web site is working and the gigabit connection is working, the answer comes back in 60 msec. So 1 second should be more than enough time.

So while there was some of this:

$ curl ‐m1 www.drjohnstechtalk.com

<!DOCTYPE HTML PUBLIC "-//IETF//DTD HTML 2.0//EN">
<html><head>
<title>301 Moved Permanently</title>
</head><body>
<h1>Moved Permanently</h1>
<p>The document has moved <a href="https://drjohnstechtalk.com/blog/">here</a>.</p>
<hr>
<address>Apache/2 Server at www.drjohnstechtalk.com Port 80</address>
</body></html>

there was also some of this:

$ curl ‐m1 www.drjohnstechtalk.com
curl: (28) connect() timed out!

We determined on our perimeter firewall that it was passing all packets.

Again, the advantage of a fixed, rarely used IP address is that you can throw it into a trace statement and not get overwhelmed with noise. So I could see from a trace taken during one of those timeouts that we weren’t getting a response to our SYN packet.

So I tried to use a SYN packet geneator to reproduce the problem and learn more. scapy. I’ve just improved my write-up of scapy to reflect some of the new ways I used it yesterday!

To begin with, I didn’t know much about scapy except what I had previously posted. But it worked every time! I could not reproduce the problem no matter how hard I tried:

>>> sr(IP(dst=”drjohnstechtalk.com”)/TCP(dport=80))

Begin emission:
........................................................................................Finished to send 1 packets.
.............................................*
Received 134 packets, got 1 answers, remaining 0 packets
(<Results: TCP:1 UDP:0 ICMP:0 Other:0>, <Unanswered: TCP:0 UDP:0 ICMP:0 Other:0>)

I racked my brains, what could be different about these scapy packets?? Also not being a TCP expert the answer is many, many things. But did I give up? No! I quickly scanned the scapy for dummies tutorial and realized a few things. I assumed scapy was randomizing its source port the way all other TCP applications do, but it wasn’t! You need a sport=RandShort() argument in the TCP section to do that. Who knew? So I had been sending packets from the same source port, specifically 20. When I switched it to a randomized port I quickly reproduced the timeout issue! And most amazingly, when I encountered a port that didn’t work, it consistently didn’t work – every single time. Its neighboring ports were fine. Some of its neighbors’ neighbors didn’t work, also consistently.

So for instance
>>> sr(IP(dst=”drjohnstechtalk.com”)/TCP(dport=80,sport=21964))

Begin emission:
........................................................................................Finished to send 1 packets.
........................................

was consistently not working. Same for source port 21962. Source port 21963 was consistently fine.

Well, this explains the intermittent SiteScope errors.

Gotta be the firewall

I know what you’re thinking. Routers don’t care about TCP port information. That’s much more like a firewall connection table thing. And I agree, but our firewall trace showed these SYN packets getting through, and no SYN_ACK coming back.

It’ way too difficult to do a trace on a Cisco router, but I looked at the router config and didn’t see anything amiss.

So I called the ISP, TWC business class. I got a pre-recorded message talking about outages in North Carolina, where this link just happens to be located! The coincidence seems too great. I still don’t have clarity from them – I guess customer service is not their strong suit. They haven’t even bothered to get back to me 24 hours later (and this is for a major fiber circuit).


References and related

The amazingly customizable packet generator known as scapy.
Probably the best write-up of scapy is this scapy for dummies PDF.

Categories
Network Technologies TCP/IP

Quick Tip: Why Windows traceroute works better than Linux

Intro
We noticed when debugging with the always useful tool traceroute (tracert on Windows systems) that we got more responsive results from Windows than from a Linux server on the same or nearby network. Finally I decided to look into it, my Linux pride at stake!

what it is is that Windows tracert utility uses ICMP by default whereas Linux traceroute uses UDP packets. We had been testing on a corporate Intranet where the default firewall policy was to allow ICMP but deny everything else.

The fix
Just add a ‐I switch to your linux traceroute command and the results will be as good as Windows. That switches the packet type to ICMP.

On the Internet where that type of firewall is more uncommon it probably won’t make that much a difference. But on an Intranet it could be just the thing you need.

Categories
Admin Network Technologies

The IT Detective Agency: spotty ISP performance traced to Google Drive

Intro
Sometimes things are not what they seem to be on the surface. I was getting lousy PING times to 8.8.8.8 at home for weeks with Centurylink, my ISP. The problem was especially bad at night. I chalked it up to too much competition for their bandwidth for streaming Netflix and other on-demand media. Their customer support was useless. They only knew enough to walk you through power-cycling your DSL modem.

ISP # 2
Hitting a brick wall, I decided after all these years to switch ISPs to Service Electric Broadband Cable. My standalone test with their modem showed good throughput. Something like 29 mbps download and 3 mbps upload using speedtest.net. Then after a few days I got around to putting more of my home network on it and the service degraded as well. could it be that both ISPs were bad at the same time? PING times were between 200 – 900 msec, with plenty of timeouts in between.

Additional symptoms

I noticed that if I power-cycled the modem things ran pretty well for a minute or two, then started going downhill again. I had observed the same thing when they had me power cycle the DSL modem. Then I noticed that when I restarted my laptop the situation improved for awhile, then degraded. So it finally dawned on me that this one laptop was correlated with the problem. In Windows 10 Task Manager it has a convenient process view that allows you to view the top bandwidth-consuming applications (click on Network).

Suspicions raised around Google Drive
There I saw that Google Drive was consuming 3 mbps! Is that a lot or not? It all depends on whether it is downloading or uploading files. In my case I happened to put several multi-GByte movie files on my laptop on the Google Drive. So clearly it was trying to upload them to the cloud. Plus, worse, the power management was such that the laptop was only powered on for a few hours – not long enough for any of those files to finish uploading!!

The short-term solution
Google Drive has a feature that allows you to limit bandwidth usage. When I set that I wanted to keep the upload going but I also wanted to work. I settled on upload of about 240 KB/sec and download of 2000 KB/sec. I figured it was high enough to use most available bandwidth, but save some for others. And I changed my power management scheme to never hibernate when plugged in.

The results
While the files were uploading performance of PING was still quite impacted, but I was doing VPN pretty comfortably so I left it alone. It was certainly better. When all files finished uploading after a few days my performance with the new ISP was great.

Why did rebooting the DSL modem help?
During reboot no Internet connection is available and Google Drive goes into an error state No connection. Periodically it checks if the Internet connection is working. Finally after a modem reboot it does begin to work, then eventually Google Drive will realize that. But even once it does, it starts from the beginning and scans all the files to see what needs to be sycned, and that takes awhile. So only after a few minutes does it begin to use your Internet bandwidth. Meanwhile you think everything is good, until it very quickly turns bad again!

Conclusion
A problem with an ISP at night is explained by the presence of an application that was taking all available bandwidth for doing massive file uploads which never completed! A change to a new ISP was not such a bad thing as it is faster and cheaper.

Categories
Admin Network Technologies

iRule script examples

Intro
F5’s BigIP load balancers have an API accessible via iRules which are written in their bastardized version of the TCL language.

I wanted to map all incoming source IPs to a unique source IP belonging to the load balancer (source NAT or snat) to avoid session stealing issues encountered in GUIxt.

First iteration
In my first approach, which was more proof-of-concept, I endeavored to preserve the original 4th octet of the scanner’s IP address (scanners are the users of GUIxt which itself is just a gateway to an SAP load balancer). I have three unused class C subnets available to me on the load balancer. So I took the third octet and did a modulo 3 operation to effectively randomly spread out the IPs in hopes of avoiding overlaps.

rule snat-test2 {
# see https://devcentral.f5.com/questions/snat-selected-source-addresses-on-a-vs
# and https://devcentral.f5.com/questions/load-balance-on-source-ip-address
# spread things out by taking modulus of 3rd octet
# - DrJ 2/11/16
when CLIENT_ACCEPTED {
# maybe IP::client_addr
set snat_Subnet_base "141"
  set ip3 [lindex [split [IP::client_addr] "."] 2]
  set ip4 [lindex [split [IP::client_addr] "."] 3]
  set offset [expr $ip3 % 3]
  set snat_Subnet [expr $snat_Subnet_base + $offset]
  set newip "10.112.$snat_Subnet.$ip4"
#  log local0. "Client IP: [IP::client_addr], ip4: $ip4, ip3: $ip3, offset: $offset, newip: $newip"
  snat $newip
}
}

It worked for awhile but eventually there were overlaps anyway and session stealing was reported.

The next act steps it up
So then I decided to cycle through all roughly 765 addresses available to me on the LB and maintain a mapping table. Maintaining variable state is tricky on the LB, as is working with arrays, syntax, version differences, … In fact the whole environment is pretty backwards, awkward, poorly documented and unpleasant. So you feel quite a sense of accomplishment when you actually get working code!

rule snat-GUIxt {
# see https://devcentral.f5.com/questions/snat-selected-source-addresses-on-a-vs
# and https://devcentral.f5.com/questions/load-balance-on-source-ip-address
# spread things out by taking modulus of 3rd octet
# - DrJ 2/22/16
 
when CLIENT_ACCEPTED {
# DrJ 2/16
# use ~ 750 addresses available to us in the SNAT pool
#  initialization. uncomment after first run
##set ::counter 0
 
  set clientip [IP::client_addr]
# can we find it in our array?
  set indx [array get ::iparray $clientip]
  set ip [lindex $indx 0]
  if {$ip == ""} {
# add new IP to array
    incr ::counter
# IPs = # IPs per subnet * # subnets = 255 * 3
    set IPs 765
    set serial [expr $::counter % $IPs]
    set subnetOffset [expr $serial / 255]
    set ip4 [expr $serial % 255 ]
    log local0. "Matched blank ip. clientip: $clientip, counter: $::counter, serial: $serial, ip4: $ip4 , subnetOffset: $subnetOffset"
    set ::iparray($clientip) $ip4
    set ::subnetarray($clientip) $subnetOffset
  } else {
# already seen IP
    set ip4 [lindex $indx 1]
    set sindx [array get ::subnetarray $clientip]
    set subnetOffset [lindex $sindx 1]
#    log local0. "Matched seen ip. counter: $::counter, ip4: $ip4 , subnetOffset: $subnetOffset"
  }
  set thrdOctet [expr 141 + $subnetOffset]
  set snat_Subnet "10.112.$thrdOctet"
 
  set newip "$snat_Subnet.$ip4"
#  log local0. "Client IP: [IP::client_addr], indx: $indx, ip4: $ip4, counter, $::counter, ip3: $thrdOctet, newip: $newip"
  snat $newip
# one-time re-set when updating the code...
# Re-set procedure:  uncomment, run, commnt out, run again... Plus set ::counter at the top
#unset ::iparray
#unset ::subnetarray
}
}

Criticism of this approach
Even though there are far fewer users than my 765 addresses, they get their addresses dynamically from many different subnets. So soon the iRule will have encountered 765 unique addresses and be forced to re-use its IPs from the beginning. At that point session stealing is likely to occur all over again! I’ve just delayed the onset.

What I would really need to do is to look for the opportunity to clear out the global arrays and the global counter when it is near its maximum value and the time is favorable, like 1 AM Sunday. But this environment makes such things so hard to program…

A word about the snat pool
I used tmsh to create a snat pool. It looks like this:

snatpool SNAT-GUIxt {
   members {
      10.112.141.0
      10.112.141.1
      10.112.141.2
      10.112.141.3
      10.112.141.4
      10.112.141.5
      10.112.141.6
      10.112.141.7
      10.112.141.8
      10.112.141.9
      10.112.141.10
      10.112.141.11
      10.112.141.12
      10.112.141.13
      10.112.141.14
      10.112.141.15
      10.112.141.16
...

Conclusion
A couple real-world iRules were presented, one significantly more sophisticated than the other. They show how awkward the language is. But it is also powerful and allows to execute some otherwise out-there ideas.

References and related
This article discusses trouble-shooting a virtual server on the load balancer

Categories
Network Technologies Web Site Technologies

Superimpose grid on video ouput from an IP camera

Intro
We were asked to superimpose a grid on the video output of an IP camera for this year’s FIRST FRC competition, FIRST STRONGHOLD, a sort of medieval-themed contest with a castle and medieval-inspired obstacles. The present thinking is that a cheap D-Link DCS-931L camera will do just fine. It’s $30 on Amazon. I found this is a real research project because it is poorly documented. So in this blog I show how to do that.

The details
D-Link provides viewing software called D-ViewCam. It has a lot of options, but not the ability to superimpose a grid. It’s more being a security console – allowing views from multiple cameras. Capturing and recording images, that sort of thing. i knew in my heart that there had to be a URL to tap into the camera directly, but it wasn’t easy to find. First I found the URL for a capture image:

http://dcs-931l/image.jpg

and that’s all i could find! I thought, OK, I can work with even that. I’ll build a web page that includes that as source image and refreshes itself as fast as possible! And despite the crudeness o that approach, it actually worked. It was a little laggy (maybe 1.2 s or so) an a little jumpy, but good enough for our purposes. Time permitting, I will share that crude code.

HTML5 video image
But then, somewhat by accident, i found a D-Link blog post where they just happened to mention the URL to a video stream that will work in an HTML5-compatible browser such as Firefox. i can’t believe how hidden they keep this URL. It is:

http://dcs-931l/mjpeg.cgi

and you treat it like an image file.

That’s the first breakthrough.

Then I found a Stackoverflow page that described how to superimpose a grid in an HTML page using CSS – Cascading Style Sheets. That sounded pretty good to me. Actually that’s what i searched for. I know there are other ways to do it but Javascript gets ugly quickly and other methods are more kludgy. At least with CSS I feel I am learning something about CSS. I am not a web developer, just a fumbler.

It’s Broken on Firefox
So i carefully implement the Stackoverflow code. you have to understand that it’s presented so tidily that you feel there’s no way it could not work. I tried it out in Firefox. No matter how much I proof-read my code, it only drew the vertical bars of the grid, but not the horizontal lines! So Firefox’s either has a bug, or the features of CSS aren’t agreed upon by all major browser vendors.

At some point I came to try my code in Chrome – worked great! That was a shock. But I wanted it to work in Firefox since that is my principal browser. I finally found that for whatever reason, in Firefox the horizontal bars have to be drawn using a different function. Instead of a more simple linear-gradient CSS function which works just fine for the vertical bars, you need to resort to a more complex repeating-linear-gradient function.

so putting all this together we arrive at the html page code. It’s nice and brief.

<html>
<head>
<style type="text/css">
<!-- DrJ 1/2016
Note that Firefox's implementation of linear-gradient is broken and requires us to
use repeat linear gradient 
Some fairly lousy documentation on repeat linear gradient is here:
https://developer.mozilla.org/en-US/docs/Web/CSS/repeating-linear-gradient
 
-->
* {
  margin: 0;
  padding: 0;
  box-sizing: border-box;
}
div {
  display: inline-block;
  position: relative;
  margin: 10px;
}
div:after {
  content: '';
  position: absolute;
  height: 100%;
  width: 100%;
  top: 0;
  left: 0;
  background: repeating-linear-gradient(to bottom, black, black 1px, transparent 1px, transparent 80px), linear-gradient(to right, black 1px, transparent 1px);
  background-size: 15%;
  padding: 1px;
}
</style></head>
<body>
<div>
  <img src="http://dcs-931l/mjpeg.cgi" width="480" height="320" />
</div>
</body></html>

That’s it!

Well, mostly. This puts a horizontal bar every 80 pixels. If i change that 80px to 15% (which is the parameter in effect for the vertical bars due to the background-size statement), it will work OK in Firefox. However, it does not work in Chrome. With 80px it works in both browsers.

Network info
Needless to say, dcs-931l is just the hostname of the camera, assuming that mDNS is all working which it generally does. You can replace that with the IP address. of course you have to be on the same LAN as the camera. This is not a setup for viewing the camera from the Internet which I haven’t looked into yet. mDNS is multicast DNS. I think this technology or its equivalent is pretty common in home networks these days. It’s a convenient way to assign (and later refer to by that name) a hostname to a dynamic IP address. There’s a Wikipedia article about it which gets pretty technical.

Where to put that HTML page – stupid Notepad tricks
Most people automatically feel HTML pages have to be on a web server, but they don’t. You can put that HTML above into a file on your PC and that’s what we will do. No local web server required at all. I just saved the file as “grid.htm” in Notepad – yes it’s as crude as it gets but I said I’m not a web developer. Yes, anyone who knew anything would at least get Notepad++, but oh well. By the way, to save a .htm file in Notepad just specify All Files and put the name in quotes “grid.htm”. I save it to C:\temp, so the URL becomes:

c:\temp\grid.htm

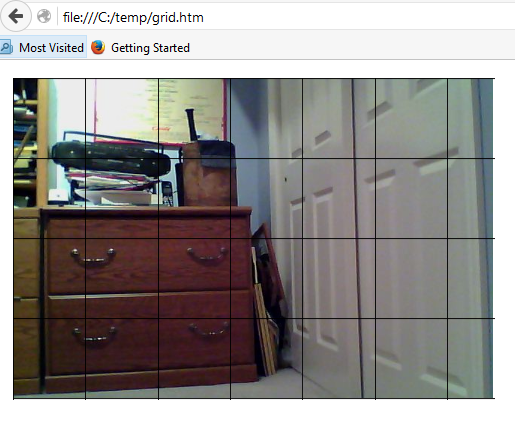
It shows up a little differently, but that’s what I typed in. And here’s a screen capture of my live video with the grid superimposed, just so it’s been documented as really working!

grid-capture

Measuring the lag of the video display
In this blog post I show an accessible technique for measuring lag that only requires two smartphones. I love to show this to students. They get all confused at first, but when you do it you see how obviously simple and accurate it is. So we measured the lag as .51 seconds. So not the best, but not terrible either.

Superimpose crosshairs instead of grid
Now that we’ve set up the basic approach, changing from a whole grid to just crosshairs, with thicker lines is as simple as changing 15% to 50%, plus changing 1px to 2px.

Password prompt

But we still get that password prompt initially when brining up our local web page. Even that can be fixed by embedding the username/passwor dinto the URL. Putting crosshairs and password toegther we arrive at this version:

<html>
<head>
<style type="text/css">
<!-- DrJ 1/2016
Note that Firefox's implementation of linear-gradient is broken and requires us to
use repeat linear gradient 
Some fairly lousy documentation on repeat linear gradient is here:
https://developer.mozilla.org/en-US/docs/Web/CSS/repeating-linear-gradient
 
-->
* {
  margin: 0;
  padding: 0;
  box-sizing: border-box;
}
div {
  display: inline-block;
  position: relative;
  margin: 10px;
}
div:after {
  content: '';
  position: absolute;
  height: 100%;
  width: 100%;
  top: 0;
  left: 0;
  background: repeating-linear-gradient(to bottom, black, black 2px, transparent 1px, transparent 50px), linear-gradient(to right, black 2px, transparent 2px);
  background-size: 50%;
  padding: 1px;
}
</style></head>
<body>
<div>
  <img src="http://admin:your_camera_password@dcs-931l/mjpeg.cgi" width="480" height="320" />
</div>
</body></html>

That is the Firefox version, of course. Replace your_camera_password with your camera’s password. Don’t use a password which contains the “@” character or things will get really complicated!

References and related
Link to competition information, including brief videos.
Cheap but functional D-Link video camera.
Stackoverflow description of superimposing a grid on an image using CSS.
Multicast DNS is described in excruciating detail here.
Blog post on measuring lag and getting streaming to work on the Raspberry Pi camera.

Categories
Network Technologies

WAN performance monitor tool

Intro
This is an interesting tool I just learned about, iPerf. It has a server and client mode. You can install it on a PC, but you need admin access to the PC.

It has a client and server mode. As client I was told to run the following test:

c:\apps\iperf> iperf3 -c 10.12.13.10 -b 50M -l 1024k -w 512k -t 25

References and related
Download site.